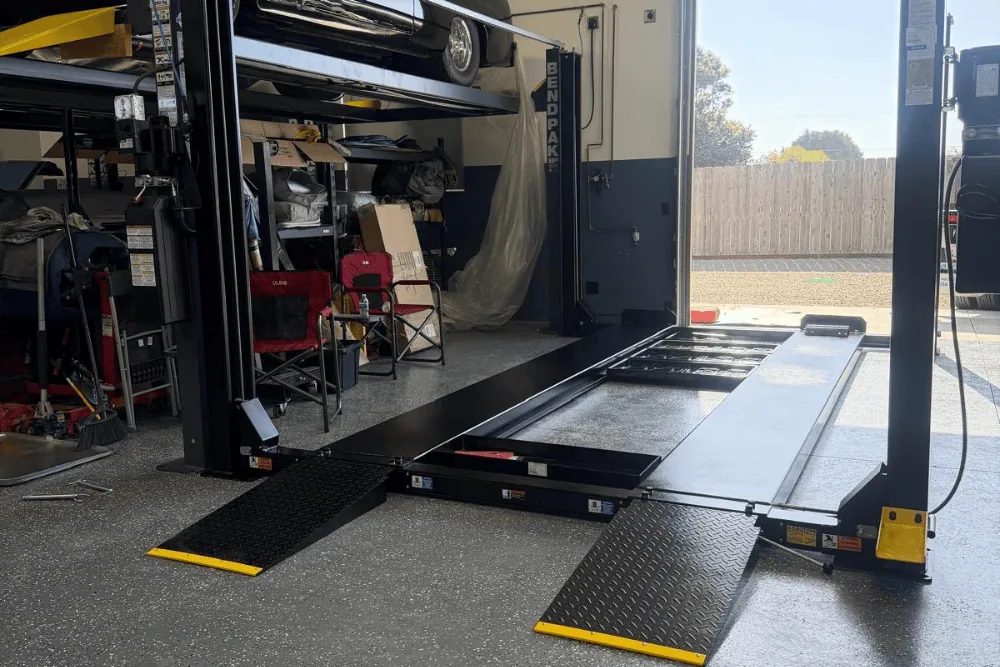


Home garage car lift installation involves more than just bolting a lift to the floor — it touches your concrete, electrical service, ceiling clearance, and in some areas, local permitting. Understanding what’s involved before you buy helps you budget accurately and avoid surprises.
This guide covers what to know about home garage car lift installation before you buy: DIY versus professional installation, what affects cost, typical timelines, permit considerations, and what happens during the installation process itself. Requirements vary by lift model and local jurisdiction, so always confirm specifics with your installer and local building department, and professional installation is strongly recommended.
Quick Answer
In short, most home garage car lift installation projects take one to two days once your garage meets the requirements, cost varies widely based on lift type and whether concrete work is needed, and professional installation is strongly recommended over DIY for safety and, in many cases, to preserve your warranty. Check local requirements if permits may apply in your area before scheduling installation.
DIY vs Professional Installation
Some experienced DIYers do install lifts themselves, but most manufacturers and installers recommend professional installation, and for good reason. Correct anchor bolt placement, torque specifications, and alignment all directly affect the lift’s long-term safety, and mistakes are not always obvious until the lift is under load.
Professional installation also often matters for warranty coverage — some manufacturers require professional installation to keep the warranty valid, so check this before deciding. If you do have relevant experience and are considering DIY installation, at minimum have a professional verify the anchor points and initial safety checks before regular use.
What Affects Installation Cost
Several factors affect home garage car lift installation cost beyond the lift itself: whether your existing concrete meets requirements or needs new work, whether your electrical panel has capacity for the lift’s power needs or requires an upgrade, the complexity of the specific lift model, and regional labor rates. Getting quotes from more than one installer helps you understand what’s typical in your area.
It’s worth budgeting for the possibility that your garage needs some preparation work, such as electrical upgrades or concrete reinforcement, in addition to the lift and its installation. Confirming your garage’s readiness ahead of time, using our garage requirements checklist, can help you get a more accurate quote from the start. For current lift prices and sample project budgets by lift type, see our 2026 car lift cost guide.
Typical Installation Timeline
A straightforward home garage car lift installation, where the garage already meets concrete, electrical, and ceiling height requirements, typically takes about one day for a two-post lift and can be similar or slightly longer for a four-post lift depending on the model. If concrete work, electrical upgrades, or permit approval are needed first, the overall timeline extends accordingly, sometimes by several weeks.
Requirements That Affect Home Garage Car Lift Installation
| Requirement | Why It Matters for Installation | Learn More |
|---|---|---|
| Concrete | Anchor bolts need adequate slab thickness and strength | Concrete guide |
| Ceiling Height | Determines which lift models will physically fit | Ceiling height guide |
| Electrical | Most lifts need a dedicated circuit at the correct voltage | Garage checklist |
| Floor Space | Clearance around the lift for safe operation | Garage checklist |
Choosing an Installer
Choosing an installer is worth as much attention as choosing the lift itself. Ask any installer you’re considering how many home garage car lift installation projects they’ve completed, whether they’re familiar with your specific lift brand, and whether they’ll handle the full scope, including any needed electrical or concrete work, or only the lift itself.
It’s also reasonable to ask for references or examples of similar installations, and to confirm in writing what’s included in the quoted price versus what might be considered an add-on once work begins, such as unexpected concrete repairs discovered during installation.
Permits: What to Check
Whether a permit is required for home garage car lift installation depends on your local jurisdiction and sometimes on whether electrical or structural work is involved. Check local requirements if permits may apply before scheduling installation — your installer may also be able to advise based on similar projects in your area, but the responsibility for confirming permit requirements typically falls on the homeowner.
What Happens During Installation
- Pre-installation site check: your installer confirms concrete, electrical, ceiling height, and floor space against the lift’s specifications.
- Any needed preparation work, such as electrical upgrades or concrete work, is completed and allowed to cure or pass inspection if required.
- The lift columns or platform are positioned, leveled, and anchored according to the manufacturer’s torque and placement specifications.
- Electrical and hydraulic connections are completed and tested.
- A functional safety check is performed, including load testing and verifying the mechanical safety locks, before the lift is cleared for regular use.
Common Installation Mistakes to Avoid
A few mistakes come up repeatedly in home garage car lift installation projects. Buying a lift before confirming ceiling height, concrete, and electrical requirements is the most common, since it can mean discovering a mismatch only after the lift arrives. Underestimating electrical needs is another frequent issue — many lifts need a dedicated 220V circuit, and assuming your existing garage outlets are sufficient without checking can delay installation.
Skipping a pre-installation site visit or phone consultation with your installer is also worth avoiding. A brief conversation before the lift ships can catch potential issues, like a doorway too narrow for delivery or a ceiling obstruction you hadn’t accounted for, while there’s still time to adjust plans.
How to Use a Car Lift Safely
Once your lift is installed and has passed its safety checks, a consistent routine matters more than speed. Always follow the operating instructions in your lift’s manual, since procedures vary by lift type and model. As a general routine:
- Clear the area. Remove tools, cords, and people from around the lift and under the vehicle before you raise it.
- Confirm the weight. Make sure the vehicle is within the lift’s rated capacity.
- Position the vehicle correctly. On a two-post lift, set the arms at the vehicle manufacturer’s recommended lift points. On a four-post lift, center the vehicle on the runways and set the wheel chocks.
- Raise a few inches and check. Lift the vehicle just off the ground, then confirm it’s stable and the contact points haven’t shifted before going higher.
- Lower onto the safety locks. Before anyone works underneath, set the lift onto its mechanical locks rather than relying on hydraulic pressure.
- Lower with care. Clear the area again, release the locks as your manual directs, and lower slowly with nothing under the arms or runways.
Portable and mid-rise lifts follow the same principles: use them on a level, solid surface, stay within the rated capacity, and engage the locks before working underneath.
After Installation
After installation, keep up with the manufacturer’s recommended maintenance schedule, and consider periodic professional inspection for long-term safety, particularly for anchor bolt integrity. The Automotive Lift Institute‘s annual lift inspection program is a useful independent reference for ongoing lift safety after your home garage car lift installation is complete.
Between professional inspections, a simple routine goes a long way:
- Keep the lift and the floor around it clean so dirt doesn’t reach moving parts.
- Lubricate moving parts with the lubricants specified in your manual.
- Inspect cables, pulleys, hoses, fasteners, and anchor bolts for wear, leaks, or looseness.
- Test the safety locks regularly to confirm they engage.
- Have the lift inspected at least once a year by a qualified lift inspector.
For the full pre-purchase picture, see our Home Garage Car Lift Guide and our garage requirements checklist.
Have questions about what your specific garage will need for installation? Contact our team and we can help you plan your home garage car lift installation from start to finish.
Warranty Considerations
Warranty coverage is another detail to sort out before your home garage car lift installation begins. Most manufacturers cover structural components and hydraulic systems for a set period, but coverage terms, and whether professional installation is a requirement to keep that coverage valid, vary by brand. Read the warranty documentation for your specific lift model rather than assuming standard terms apply.
It’s also worth registering your lift with the manufacturer after installation if that’s an option, since this can simplify warranty claims later and sometimes triggers useful maintenance reminders. Keep your installation paperwork, including anchor bolt torque records if your installer provides them, in case you need them for warranty or resale purposes down the line.
Taking a little extra time upfront to confirm your garage’s readiness, choose a qualified installer, and understand what’s included in your quote pays off across the entire life of the lift, not just on installation day. A smooth home garage car lift installation sets the foundation for years of safe, reliable use.
If you’re comparing quotes from multiple installers, ask each one the same set of questions about experience, warranty implications, and what’s included, so you can compare answers directly rather than just comparing bottom-line prices.
With the right preparation, home garage car lift installation is a manageable, well-understood process rather than a source of surprises.
Start with your garage’s actual measurements and requirements, then work outward from there toward specific lift models and installers.
FAQs
How long does home garage car lift installation take?
A straightforward installation typically takes about one day once your garage already meets concrete, electrical, and ceiling height requirements. Additional preparation work, such as concrete or electrical upgrades, extends the timeline.
Can I install a car lift myself?
Some experienced DIYers do, but professional installation is strongly recommended for safety and is sometimes required to keep the manufacturer’s warranty valid. Incorrect anchor placement or torque specifications are not always obvious until the lift is under load.
Do I need a permit for home garage car lift installation?
It depends on your local jurisdiction and the scope of any electrical or structural work involved. Check local requirements if permits may apply before scheduling installation.
What does home garage car lift installation typically cost?
Cost varies based on the lift itself, whether your concrete or electrical service need upgrades, and local labor rates. Getting quotes from more than one installer helps you understand typical pricing in your area.
What happens if my garage does not meet installation requirements?
Your installer can typically advise on what preparation work is needed, whether that’s concrete reinforcement, an electrical upgrade, or reconsidering lift type based on ceiling height. Confirming requirements before you buy helps avoid this being discovered mid-installation.
Is professional installation required to keep the warranty valid?
Some manufacturers require professional installation to keep the warranty valid, though this varies by brand. Confirm this detail before deciding between DIY and professional installation.
How do you use a car lift safely?
Clear the area, confirm the vehicle is within the lift’s rated capacity, position it at the correct lift points or centered on the runways, raise it a few inches to check stability, and lower it onto the mechanical safety locks before working underneath. Always follow your lift’s manual.
How often should a car lift be inspected?
Do quick visual checks and test the safety locks regularly, and have the lift inspected at least once a year by a qualified lift inspector.